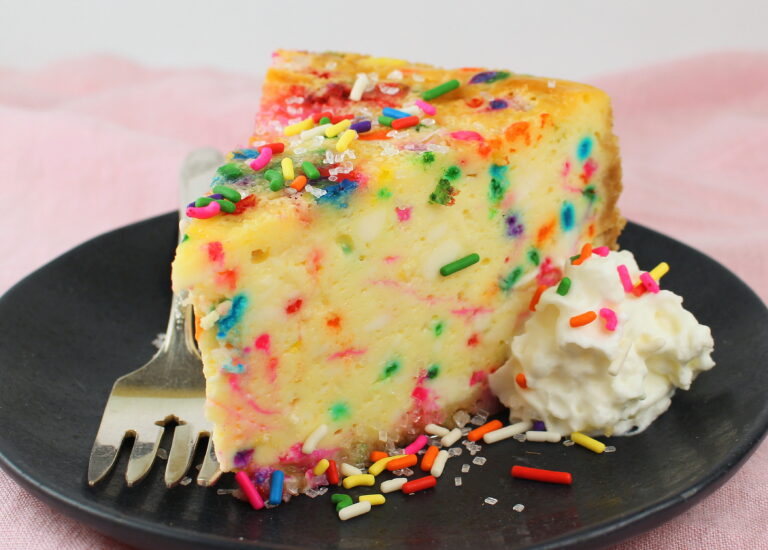
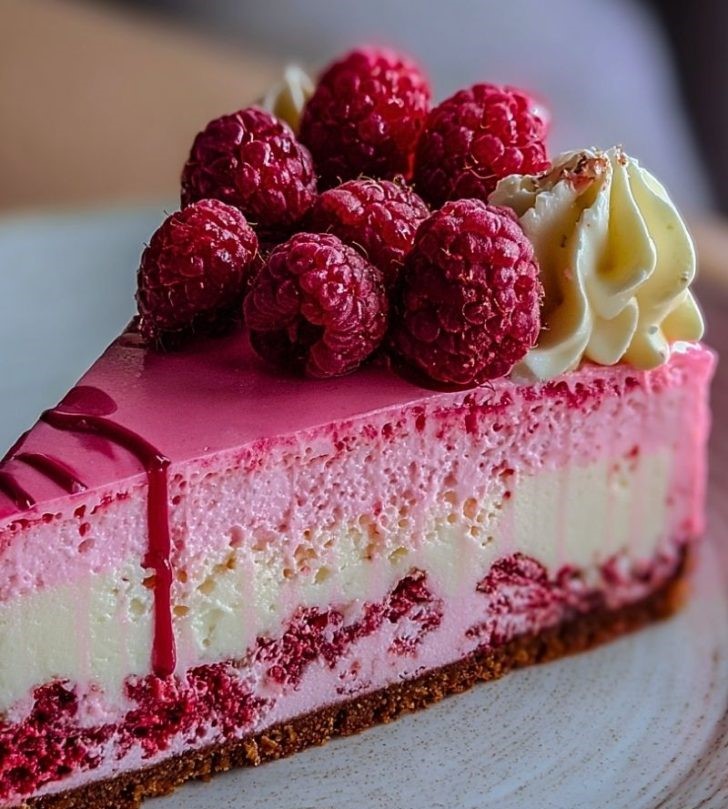
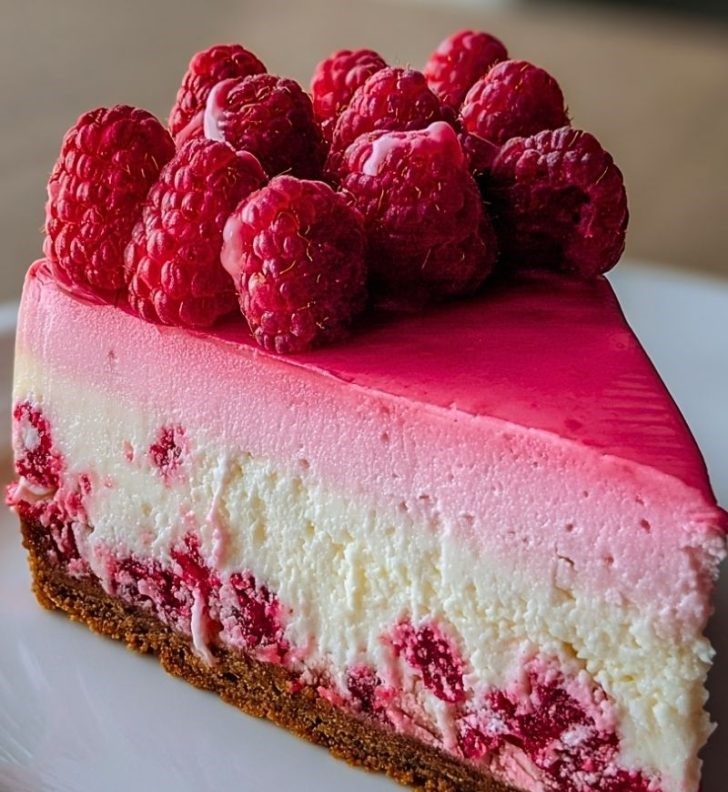
Pink Velvet Raspberry Cheesecake – Luscious & Creamy
If you’re looking for a dessert that feels both elegant and indulgent, this Pink Velvet Raspberry Cheesecake is exactly what you need. It combines the creamy richness of cheesecake with the light, fruity brightness of raspberries, all wrapped in a beautiful pink hue that makes it stand out on any dessert table. This recipe is not only visually stunning but also full of flavor that balances sweetness, creaminess, and tang. It’s the kind of dessert that feels perfect for holidays, birthdays, anniversaries, or any time you want to surprise your family and friends with something memorable.
What makes this Pink Velvet Raspberry Cheesecake so special is how it brings together layers of flavor and texture. The buttery crust gives you a crisp foundation, the smooth cheesecake layer melts in your mouth, and the raspberry swirl adds a burst of freshness in every bite. To finish it off, a soft pink color gives it a unique and playful touch while still looking classy. Whether you’ve made cheesecakes before or are giving it a try for the first time, this recipe is simple enough to follow step by step and will leave you with a dessert that feels straight out of a bakery.
Why You’ll Love This Pink Velvet Raspberry Cheesecake
- A stunning presentation that impresses effortlessly. The pink coloring and raspberry swirls make this Pink Velvet Raspberry Cheesecake look like something from a patisserie, so it’s guaranteed to draw attention. You won’t need to decorate much because the cheesecake itself does all the work.
- Perfect balance of flavors in every bite. The richness of the creamy cheesecake pairs beautifully with the tartness of the raspberries. It’s not overly sweet, making it enjoyable even for people who don’t usually like heavy desserts.
- Ideal for special occasions or casual treats. This Pink Velvet Raspberry Cheesecake works for Valentine’s Day, Easter, birthdays, showers, or even a simple weekend family dinner. It brings that little extra joy without feeling fussy.
- Beginner-friendly recipe with clear steps. Even if you’ve never baked cheesecake before, the instructions guide you through each stage so you can bake confidently and get the right results.
- Customizable with endless variations. You can change up the crust, add different fruit toppings, or even make mini versions for parties. It’s versatile enough to adjust for your own tastes and events.
Kitchen Tools You’ll Need
- Springform pan (9-inch) – This is the key for cheesecakes, allowing you to release it cleanly after baking.
- Mixing bowls (various sizes) – You’ll need more than one bowl for separating ingredients as you prepare the crust, filling, and topping.
- Hand or stand mixer – Essential for achieving a smooth and lump-free cheesecake batter.
- Spatula and spoon – A spatula helps you scrape the bowl clean, and the spoon is handy for pressing the crust into the pan.
- Measuring cups and spoons – Accurate measurements are important for cheesecake success.
- Baking sheet with water (optional) – For a water bath method, which helps prevent cracks.
- Knife and skewer – Used to swirl the raspberry puree into the cheesecake for that pretty marbled effect.
Ingredients You’ll Need
For the crust:
For the filling:
For the raspberry swirl:
How To Make Pink Velvet Raspberry Cheesecake
Prepare the crust
Start by crushing your cookies or graham crackers into fine crumbs. Mix them with melted butter until the texture resembles wet sand. Press the mixture firmly into the bottom of your springform pan to create a stable and flavorful base for your cheesecake.
Whip the cream cheese filling
In a large mixing bowl, beat the softened cream cheese until it’s smooth and creamy with no lumps. Add the sugar and pink food coloring, then continue mixing until the color is evenly distributed. This ensures your cheesecake filling will have that gorgeous, velvety pink hue.
Add the eggs and sour cream
Crack in the eggs one at a time, beating just enough after each to incorporate. Mix in the sour cream and vanilla extract for a creamy and slightly tangy finish. Avoid over-mixing at this stage so your cheesecake bakes evenly without cracking.
Fold in the raspberry puree
Gently fold in the fresh raspberry puree with a spatula, swirling it lightly to keep the pink streaks visible. This gives your cheesecake both flavor and a beautiful marbled effect. Don’t stir too much, or you’ll lose the pretty ribbons of raspberry.
Bake the cheesecake
Pour the filling over the prepared crust and smooth the top with a spatula. Place the pan in a water bath to help prevent cracks and bake until the edges are set but the center is still slightly jiggly. This gentle baking method ensures a silky, custard-like texture.
Cool and chill
Let the cheesecake cool at room temperature for at least an hour before transferring it to the fridge. Chill for a minimum of 4 hours, but overnight is best for firm slices. This waiting time helps the flavors deepen and the texture set perfectly.
Decorate and serve
Before serving, top the chilled cheesecake with whipped cream and fresh raspberries for a finishing touch. You can also drizzle raspberry sauce or add chocolate shavings for extra flair. Slice with a sharp knife cleaned between cuts for neat, beautiful servings.
Tips for Best Results
Common Mistakes to Avoid
Serving Suggestions
Storage and Leftovers
Nutrition Information (per slice, 12 slices)
|
Calories |
~420 |
|
Protein |
7g |
|
Fat |
28g |
|
Saturated Fat |
10g |
|
Carbohydrates |
34g |
|
Sugar |
22g |
|
Cholesterol |
95g |
|
Sodium |
780g |
Frequently Asked Questions
Conclusion
This Pink Velvet Raspberry Cheesecake is more than just a dessert—it’s a centerpiece. It has a silky, creamy texture, bursts of raspberry flavor, and a beautiful pink swirl that makes it special for any occasion. With the simple steps in this recipe, you can bring bakery-quality cheesecake right into your own kitchen. Whether you’re baking it for family, friends, or simply to treat yourself, this cheesecake will always bring compliments and happy smiles.